Mastering The New Notion Forms Feature: A Comprehensive Guide
.png)
With its latest release, Notion has introduced native forms—a feature that empowers users to collect, manage, and organize information directly within their Notion workspace.
This update opens up exciting possibilities for team collaboration, customer feedback collection, survey creation, and much more, all without needing third-party integrations.
In this guide, we’ll explore everything you need to know about Notion Forms, including the question types, customisation options, and a step-by-step guide to creating your first form. By the end, you’ll be equipped to make the most of this powerful new tool.
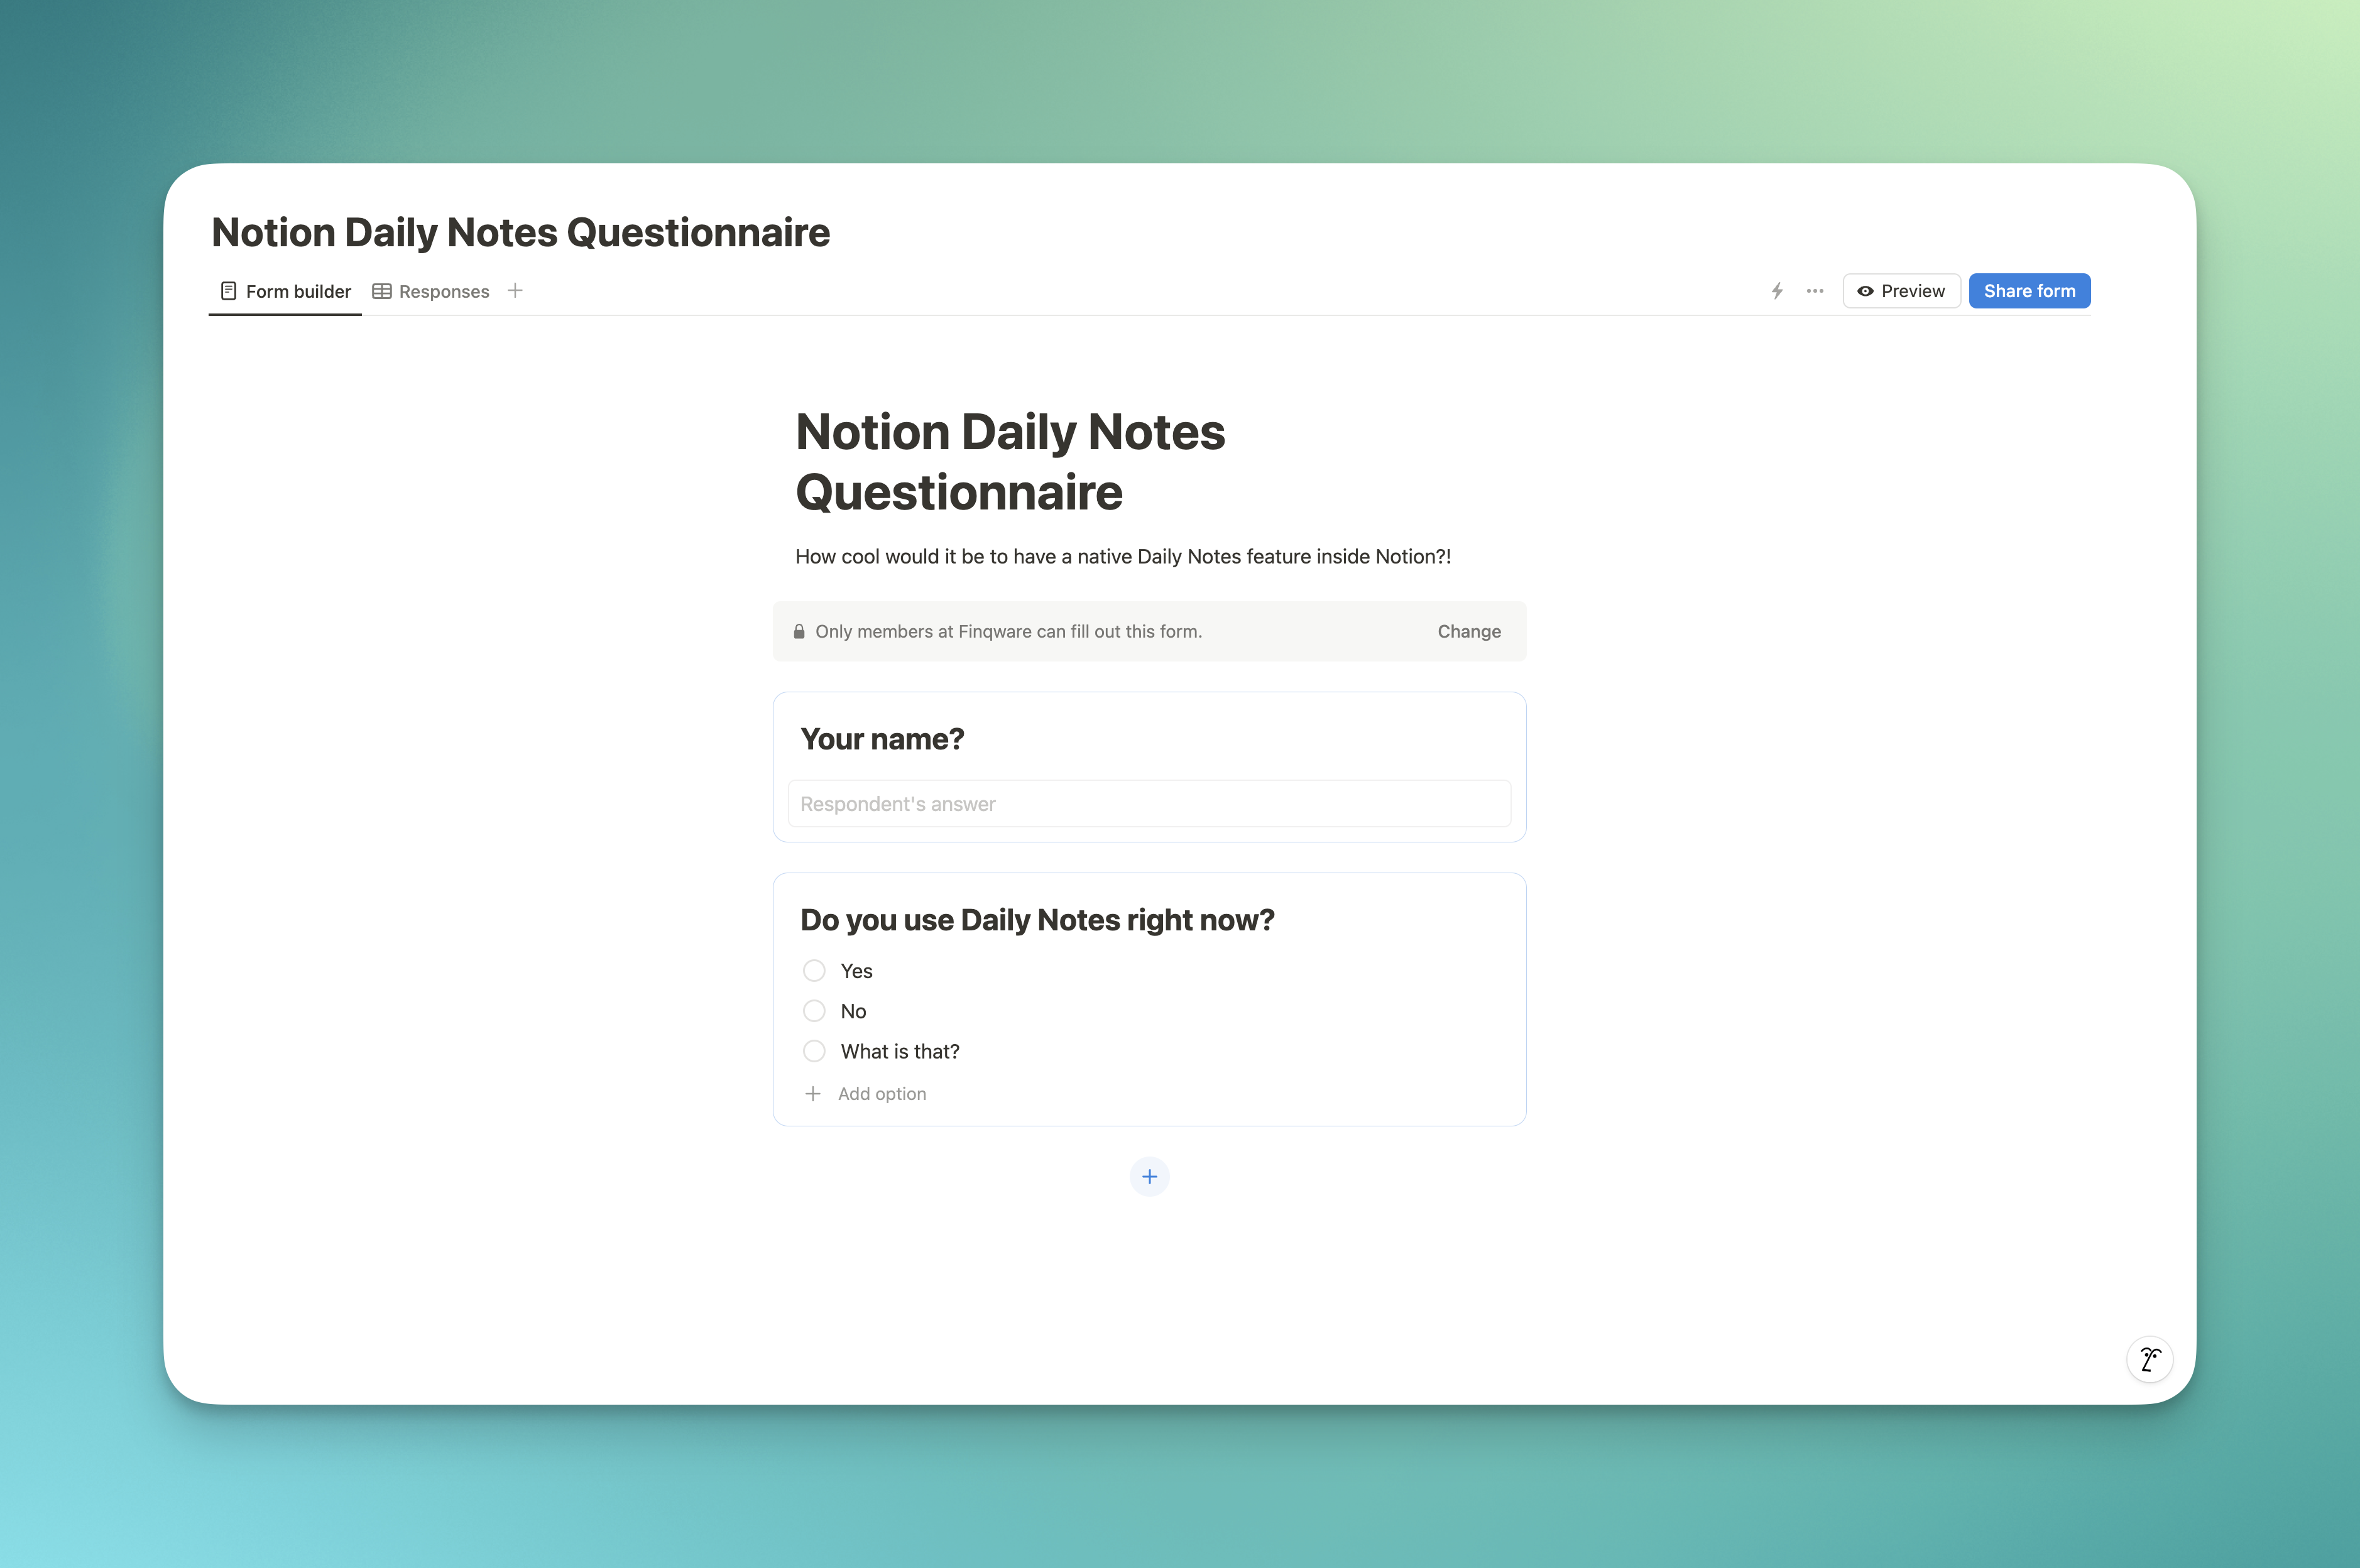
What Are Notion Forms and Why Should You Use Them?
Notion Forms streamline data collection by integrating seamlessly with Notion databases, removing the need for external tools. Basically Notion forms is part of Notion databases.
Here’s why Notion Forms is great:
- Native Integration: Data collected through forms is stored directly in Notion databases, providing a centralised solution for all your data.
- Customisation: Notion Forms allow you to tailor fields and options to suit different data collection needs, making them versatile and adaptable.
- Easy Sharing and Accessibility: Forms can be shared via direct links or embedded into pages, making them easy to distribute to both internal teams and external users.
- Automated Tracking: Responses are automatically organised, making it simple to view, filter, and analyse form submissions without extra setup.
Everything to Know About the New Notion Forms
With Notion’s form builder, users can create dynamic forms that cater to various use cases. Here’s a breakdown of each key aspect:
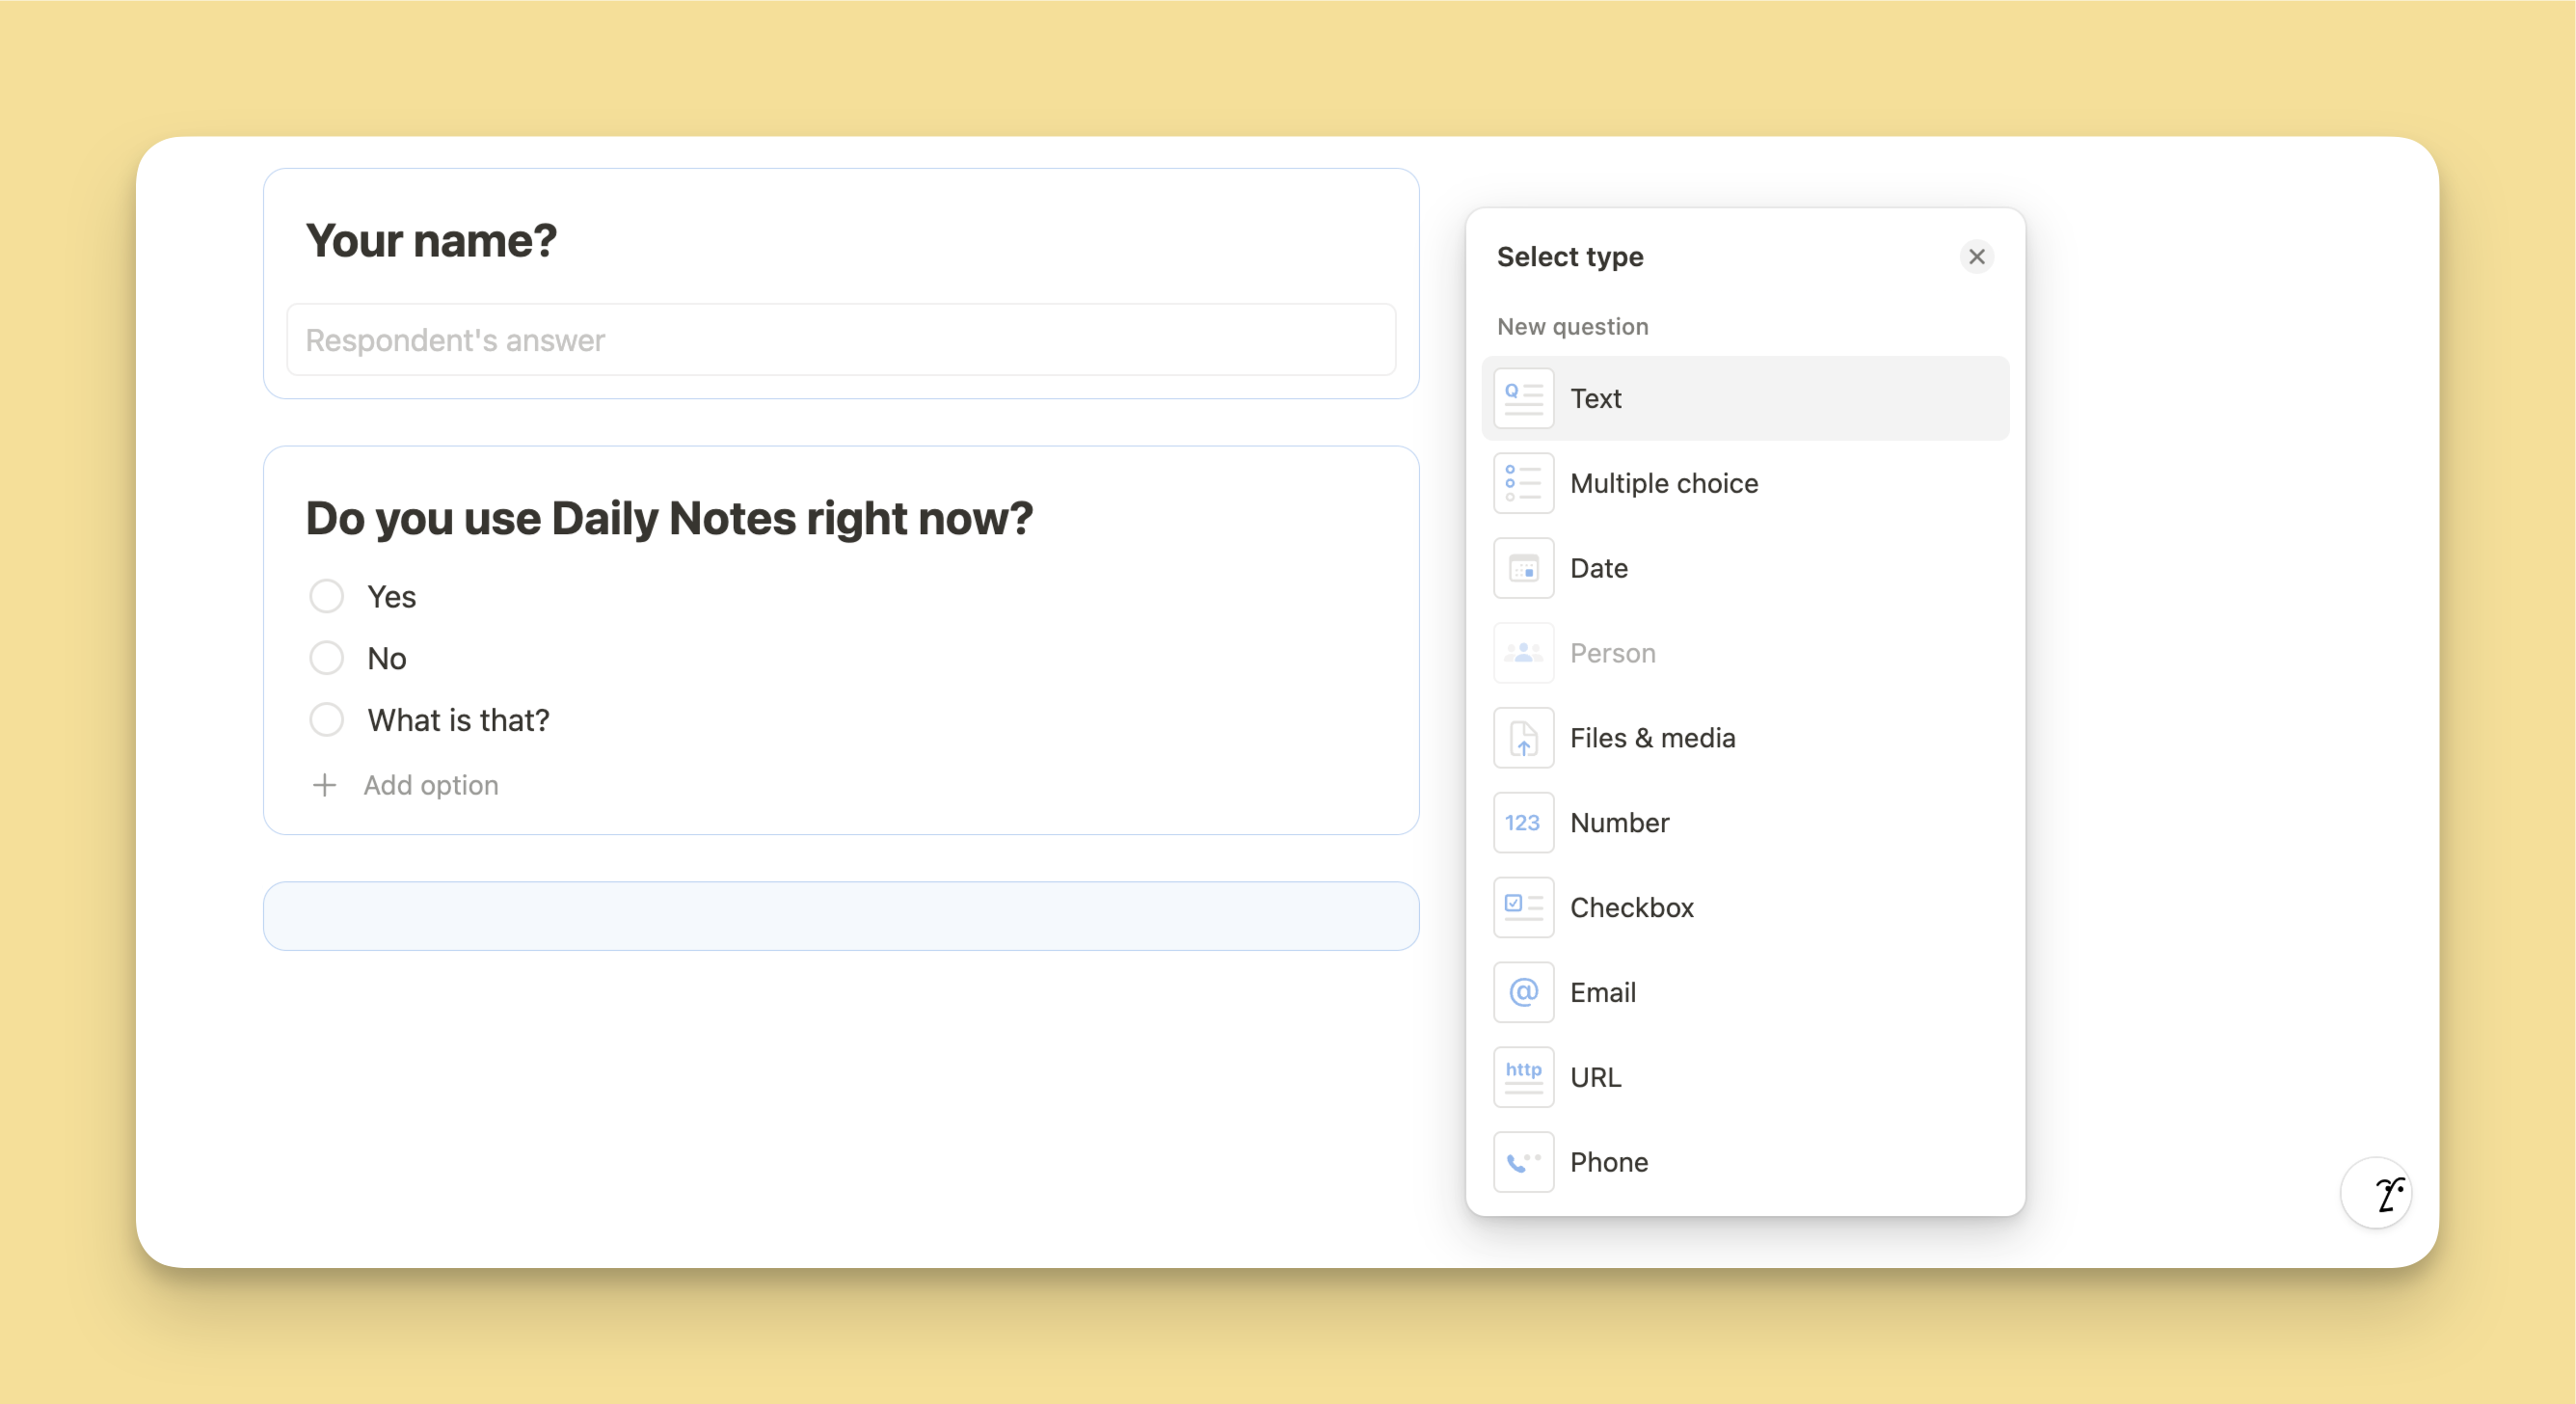
1. Question Types
Notion Forms support a diverse range of question types, making it easy to collect different types of data:
- Text: Ideal for open-ended responses or short answers.
- Extra Options: Long Answer → Make the input field bigger for longer text inputs.
- Multiple Choice: Provides predefined options, making it perfect for surveys or selection-based questions.
- Date: Use for scheduling, deadlines, or collecting any date-related information.
- Extra Options: End Date, Include time
- Person: Allows respondents to select people within your workspace, which is useful for team assignments or responsibility tracking. It works only if the form is not shared publicly.
- Extra Options: Max Selection → Choose how many people can be selected.
- Files & Media: Accepts file uploads, enabling users to submit documents, images, or other media directly in the form.
- Number: For numeric responses, like quantities, ratings, or scores.
- Checkbox: Useful for binary options, like “Yes/No” or “I agree.”
- Email: Specifically formatted for email addresses.
- URL: Collects URLs or website links.
- Phone: Allows for collecting phone numbers, useful for contact forms or customer information.
Each question type helps tailor the form to your specific needs and enhances data quality by guiding respondents.
2. Question Options

Notion Forms offer several options to control each question’s behaviour and appearance. We mentioned the question specific options above, now let's see the options that every type of question has:
- Required: Make specific questions mandatory to ensure you collect essential information.
- Description: Add context or instructions beneath a question to help respondents answer accurately.
- Question Type: Easily switch between question types to adapt to the kind of data you need.
- View Linked Property: Check the connected database property.
- Sync with Property Name: Ensures the question’s title matches the linked database property. If disabled, the two names don't have to match.
- Duplicate Question: Pretty self explanatory :)
- Delete Question: Remove any unnecessary questions with a single click.
These options give you full control over how data is captured and organised, enabling a more refined and responsive form experience.
3. Form Customisation
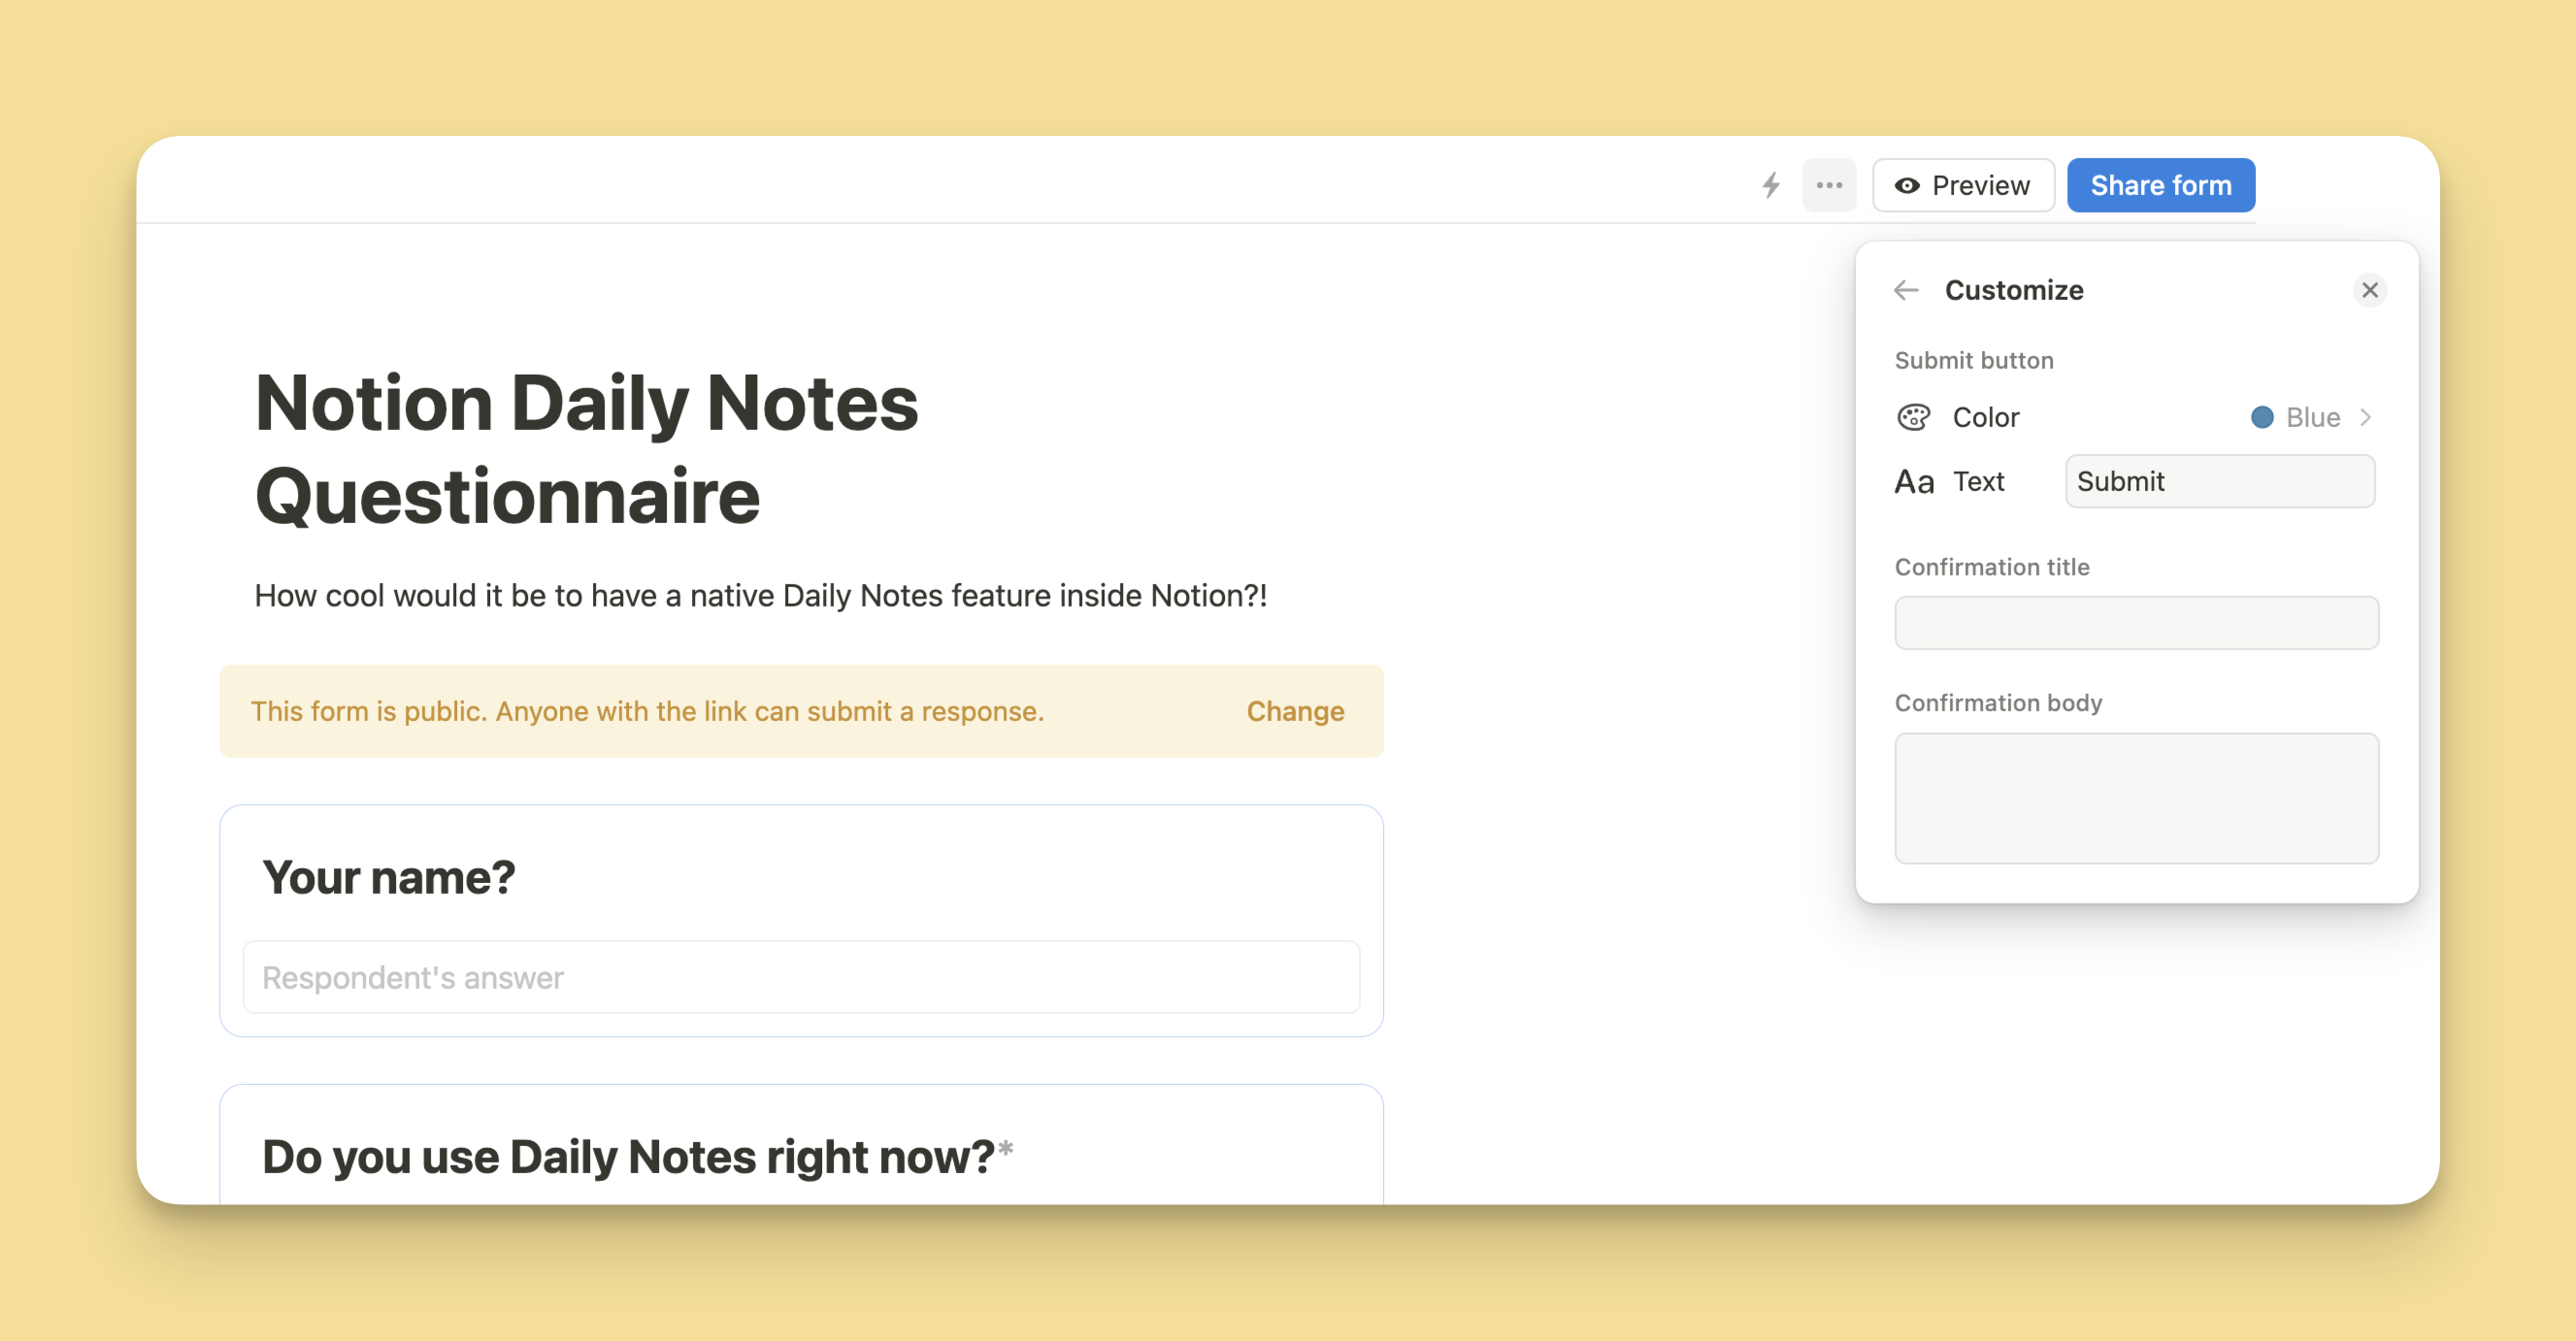
Notion provides various customisation options to personalise your forms. This can be accessed by clicking on the 3 dots (•••) icon next to the "Preview" button and selecting "Customize form".
- Submit Button: You can personalize the submit button by changing its color to match your brand’s theme or the form’s purpose. Additionally, customize the button text to encourage responses, such as “Send Feedback” or “Submit Application,” making the action clear for respondents.
- Confirmation Title: After a user submits the form, they’ll see a confirmation message. Customize the confirmation title to acknowledge their submission, like “Thank You!” or “Form Submitted Successfully,” to give users reassurance.
- Confirmation Body: Provide additional details in the confirmation body, such as next steps, expected response times, or contact information. For example, “We’ll get back to you within 48 hours,” or “Feel free to reach out if you have questions at support@example.com.” This extra touch improves communication and builds confidence with respondents.
These customization features allow you to create a form experience that feels personalized and professional, improving user engagement and clarity.
4. Sharing Options
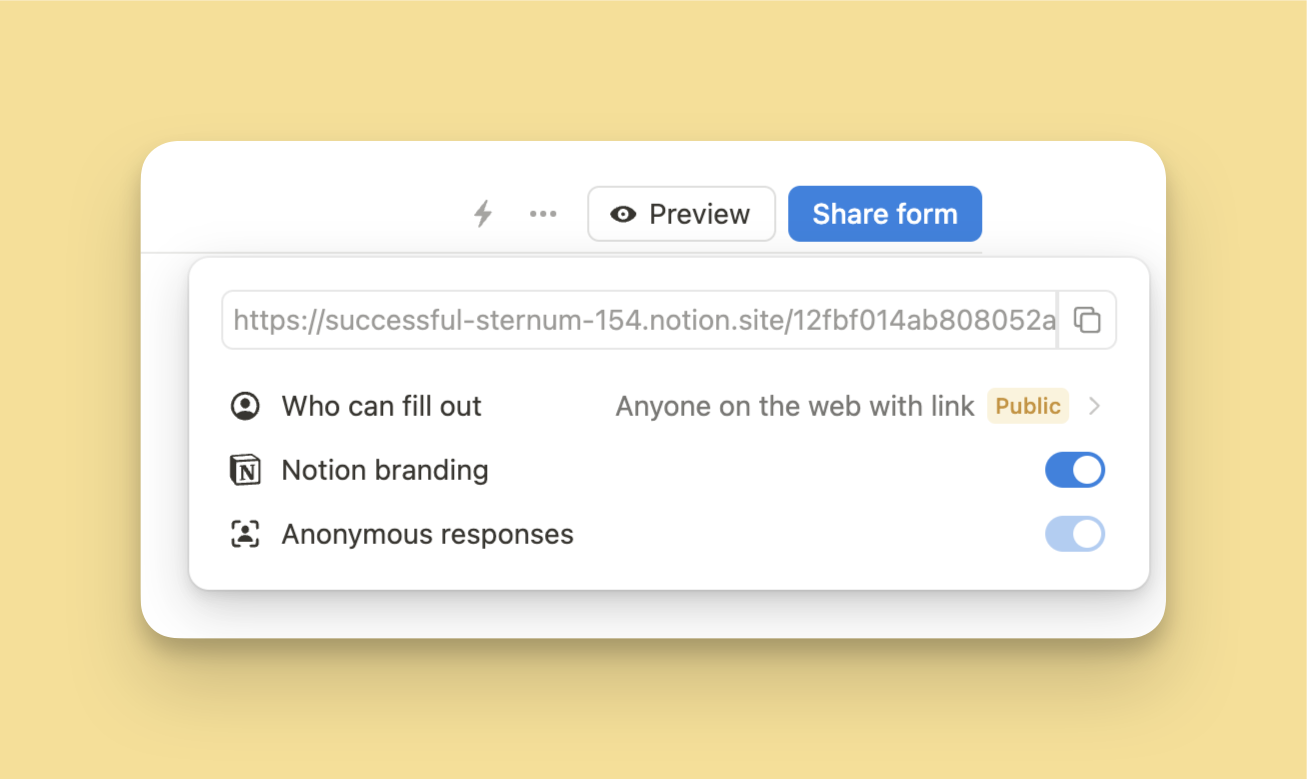
Notion Forms come with flexible sharing settings, giving you control over who can access your form and how responses are submitted. Here are the main sharing options to consider:
- Internal Access: For forms used within your team or organization, you can restrict access to internal Notion users only. This setting is ideal for forms collecting internal feedback, project updates, or team assignments, ensuring that only authorized users can view and submit responses.
- Public Access: You can also share your form publicly by generating a shareable link, allowing external respondents to access the form without needing a Notion account. This is useful for collecting customer feedback, running surveys, or gathering responses from people outside your organization. Public forms can be distributed through emails, embedded on websites, or shared on social media.
- Disable Form Access: If a form is no longer in use, you can disable access altogether. This stops further submissions and is useful for limited-time surveys or forms where submissions are closed.
- Additional Options:
- Accept Anonymous Responses: Enable anonymous submissions if you want to collect feedback without requiring respondents to identify themselves. This setting is particularly helpful for sensitive surveys or feedback forms.
- Remove Notion Branding: For a more professional or customized look, you can remove Notion branding from your form, creating a seamless experience for respondents without any Notion references.
These sharing options provide flexibility to meet various use cases, from secure internal data collection to public surveys, while giving you control over respondent identity and form appearance.
5. Form Submissions
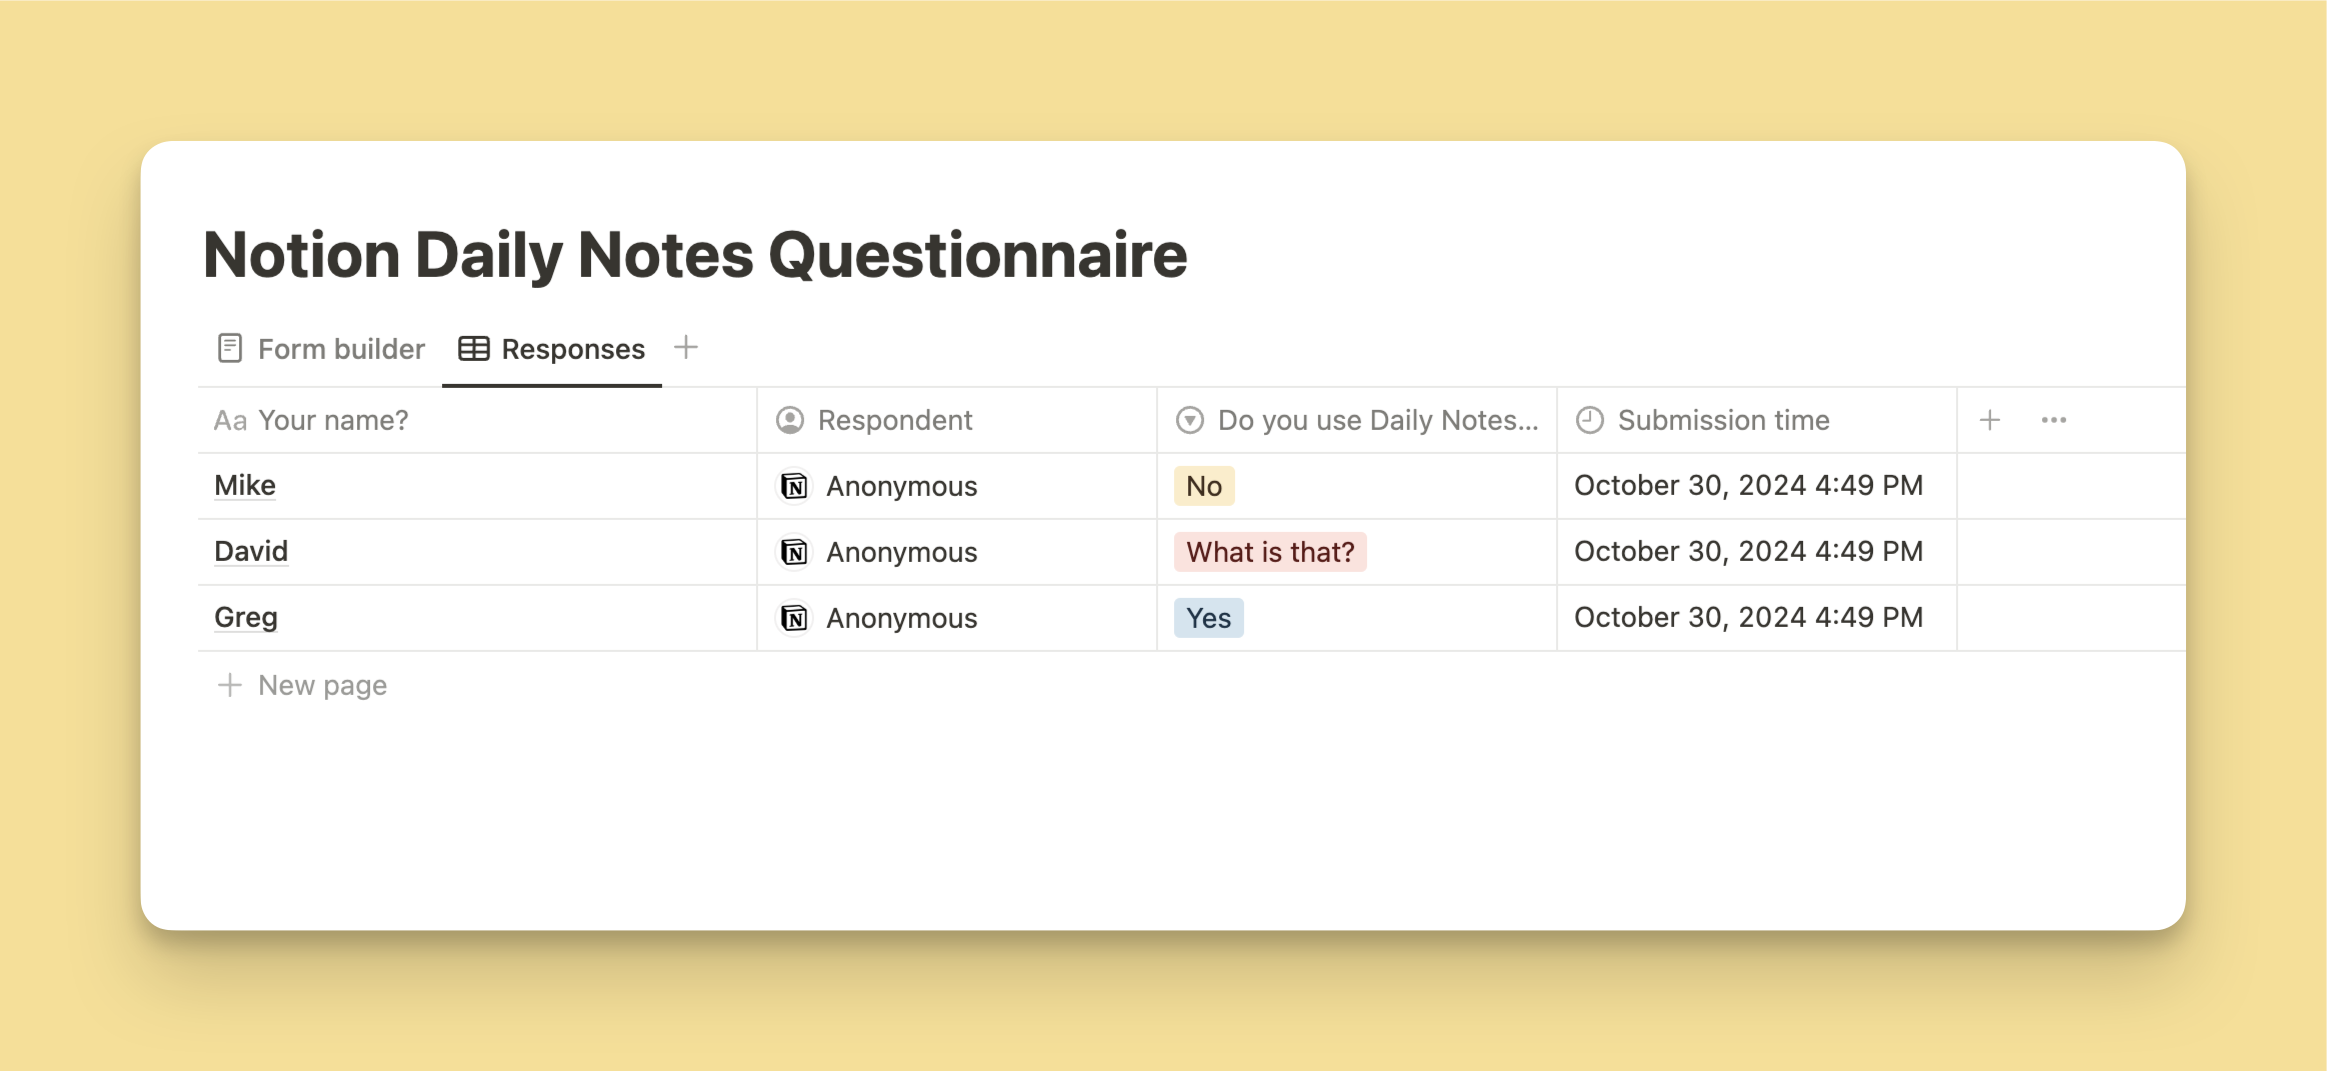
Form submissions in Notion are automatically saved in the linked database, making it easy to review, sort, and manage responses. You can create different database views to analyze data more effectively. For instance:
- Kanban or Calendar Views: Perfect for task-related responses or event scheduling.
- Filtered Views: Separate responses based on status, category, or other criteria.
- Charts: Use charts view to visualise the form submission data.
Good to know: Creating new property in the database will not create a new question in the form. But creating a form question, will automatically create a new property in the database.
6. Combine Charts with Forms
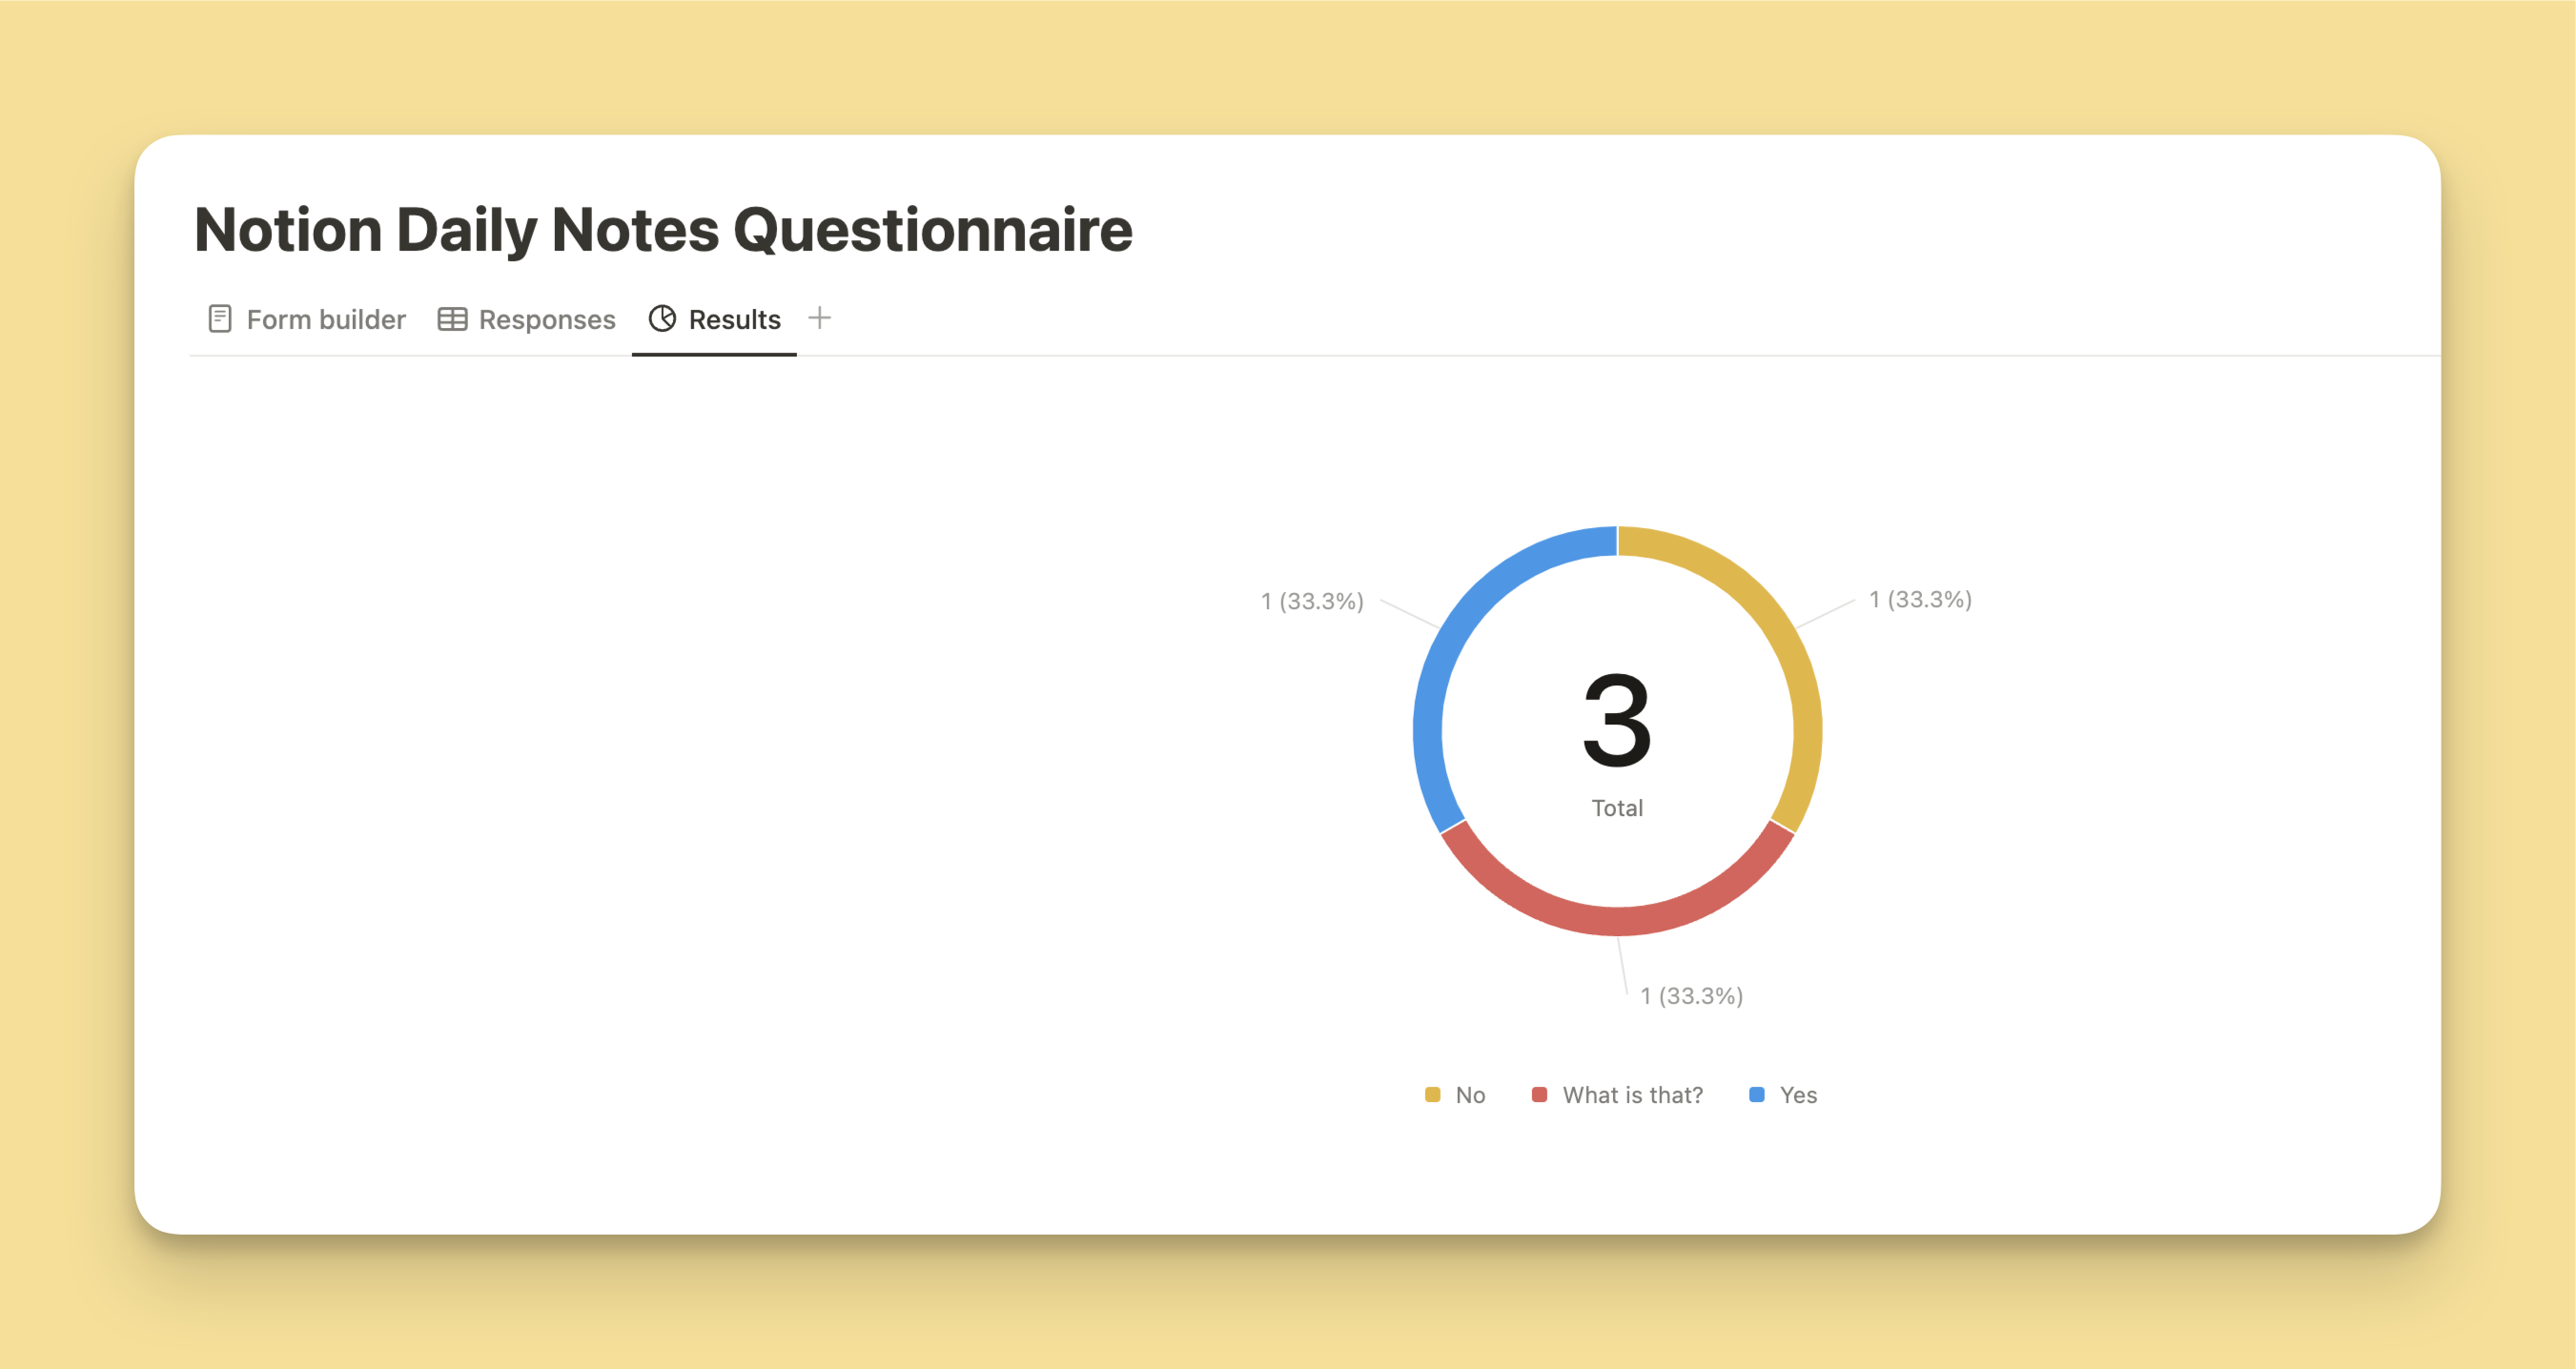
Notion’s integration with databases means you can visualize form data directly in Notion using charts and graphs. Here’s how:
- Create a Chart: Use Notion’s database to chart responses, allowing for visual insights. For example, if your form tracks satisfaction scores, you can plot these responses on a bar or pie chart.
- Filter Data for Specific Insights: You can filter your charts based on submission date, answer type, or other parameters to analyze trends or isolate particular feedback.
- Shareable Reports: Notion allows you to share these visual reports by embedding them in other pages or dashboards, providing actionable insights for your team.
By combining forms and charts, you transform raw data into visual summaries, helping you and your team make informed decisions quickly.
Step-by-Step Guide to Creating a Form in Notion
Creating forms in Notion is quite intuitive, but just to be safe, we cover this, step by step. Follow these steps to create a form and start collecting data:
1. Create or Open a Database
You can create a new page/database, or you can add Forms to existing databases by adding a new "Form" view. If you don’t have a database set up, create one as the first step. This will store all responses in a structured way.
2. Give It a Title, Icon, and Header Image
Customize the appearance of your database by adding a title, icon, and header image. This not only personalizes your form but also makes it visually appealing and recognizable.
3. Add and Customize Your Questions
Set up your form questions based on the data you wish to collect. Use different question types—such as text, multiple choice, date, or checkbox—to fit your requirements. Adjust settings like making questions required or adding descriptions for clarity.
4. Customize the Button and Success Message
Personalize the submit button by adjusting the color and text to align with your form’s theme or purpose (e.g., “Submit Feedback” or “Register Now”). Also, customize the success message, including the title and body text. This lets you thank respondents or provide follow-up information after they submit the form.
5. Preview & Test to Ensure It’s Ready
Click on Preview to view your form as respondents will see it. Check each question, button, and message to make sure everything functions as expected and that the form flow is smooth.
6. Decide on Sharing Options
Choose the best sharing settings for your form:
- Internal access for team-only responses
- Public access for wider distribution
- Anonymous submissions if required
- Optionally remove Notion branding for a cleaner, branded look
7. Share the Form
Once you’re happy with your setup, share the form by copying a link or embedding it in a Notion page. Adjust permissions based on your chosen sharing options.
8. Create New Database Views/Charts for Submissions
With responses collected in your database, set up views or charts to organize and analyze the data. For example, create Kanban boards, calendar views, or bar charts to visualize submissions and gain insights from responses at a glance.
This step-by-step guide enables you to create a fully customized, shareable form in Notion, ensuring you’re ready to gather, manage, and analyze data effortlessly.
Frequently Asked Questions
Can I use Notion Forms outside of Notion?
Yes, you can share Notion Forms via a direct link, allowing anyone with access to fill it out.
How do I modify questions after creating a form?
Go to your form’s edit mode to add, remove, or modify questions. Changes are reflected automatically in the live form.
Are there limits on the number of responses?
There are currently no limits, but large datasets can impact performance.
Can I add images or file uploads?
Yes, you can allow respondents to upload files directly through the form’s file and media question type.
Is conditional logic available?
Not yet, but knowing the Notion team, probably it will be implemented in future updates.
Conclusion
Notion Forms empower users to collect and manage data seamlessly within their workspace. With its customizable fields, intuitive design, and integration with Notion databases, this tool provides a powerful and user-friendly solution for a wide range of data collection needs.
As you explore and adapt Notion Forms for your workflows, you’ll discover new ways to streamline processes, boost productivity, and make data-driven decisions. So, dive in and start creating forms to see how they can transform your data management experience in Notion!
